You may see people using hard disks of sizes up to 2TB on their computers or laptop. At the same time, you may also see users adjusting with approximately 128 or 256GB of hard disk space. While it’s easy to manage storage space on Windows 10, what if your PC has multiple user accounts, and one of them ends up using all hard disk space? This is a rare thing, but it can happen.
Prevent a User From Using all Hard Disk Space in Windows
To prevent such things, you need to prevent a user from using all hard disk space in Windows. You need to set up a Hard Disk quota, which is possible without installing any third-party app. So, let’s check out how to prevent users from using all hard disk space in Windows.
First, right-click on the disk partition or the drive on which you wish to create the disk quota. After the right-click, there will be a list menu that will appear on the screen, select the properties.ace.
Properties window will appear on the screen; from there, you have to click on the “Quota” tab and click the button “Show Quota Settings“.
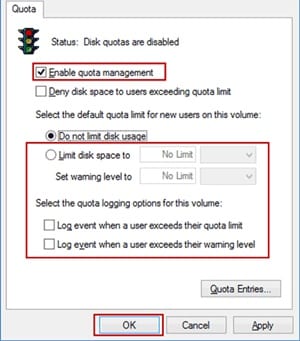
You will now reach the place from where you could be able to create the disk quota. Select the “Enable quota management” checkbox to head to the advanced section.
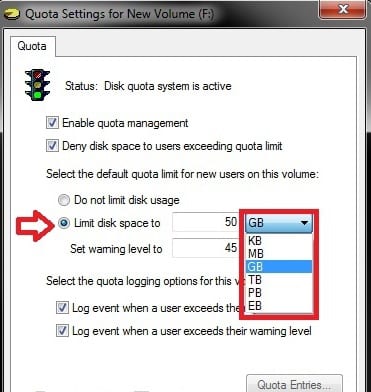
From the advanced panel, choose and select the “Limit disk space to” option, and after that, put in the limit for the disk space through which you could be able to use. You can set the warning limit for the disk space where the user will get the warning message if the space-filling reaches the limit.
Save the changes you have made and finalize the amount of disk space available for usage. You could use the set amount of disk space, and you will not be able to exceed that. But this does not mean you will not be able to use the rest of your disk space. Simply delete the quote from the quota entries window, and you will revert the whole method! So, this is the easiest way to prevent a user from using all hard disk space in Windows. If you need more help setting the disk quota, let us know in the comments below.
Δ


