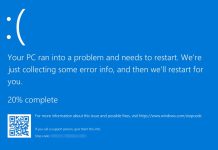
The method that I used was simple, and I just accessed the command prompt of the system recovery, type some commands, and everything was fixed. And you can now easily use my guide to fix this issue if you are also facing the same issue. So have a look at the complete guide discussed below to proceed. Also Read: Windows 10 Free Download Full Version 32 or 64 Bit
Steps to Fix the MBR (Master Boot Record) in Windows 10
The method is quite simple and easy, and you need to follow the simple step-by-step guide as you will no need any of the tools as you will use one trick that will help you fix these issues on your PC. So follow the below steps to proceed.
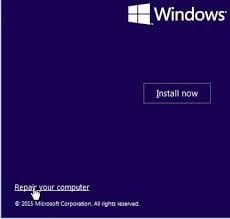
First of you need to access system settings from your boot screen, and for that, either you can use any Windows bootable USB to use the option Repair your computer, or you can use the keys like ESC F8 to access these settings.
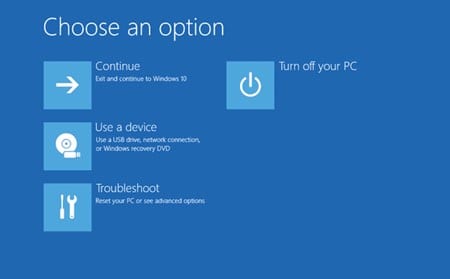
Once you reach that screen, you need to click on Troubleshoot to access the further settings.
Now, on the next screen, you need to select the option Command Prompt as this will allow you to enter the commands, and you can hit the recovery commands.
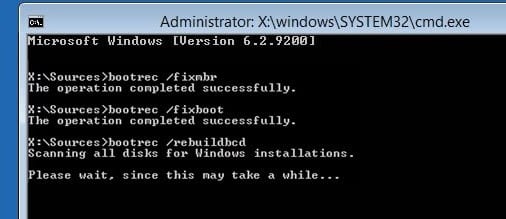
Now command prompt will appears, and there you need to enter the command bootrec /fixmbr.
Now enter the command bootrec /fixboot and bootrec /rebuildbcd.
This will now fix to recover MBR and fix the boot issue. Exit the screen and go back to the boot screen and try to restart the computer and you will see the issue will get fixed, and you will be able to login to your computer.
Using EaseUS Partition Master
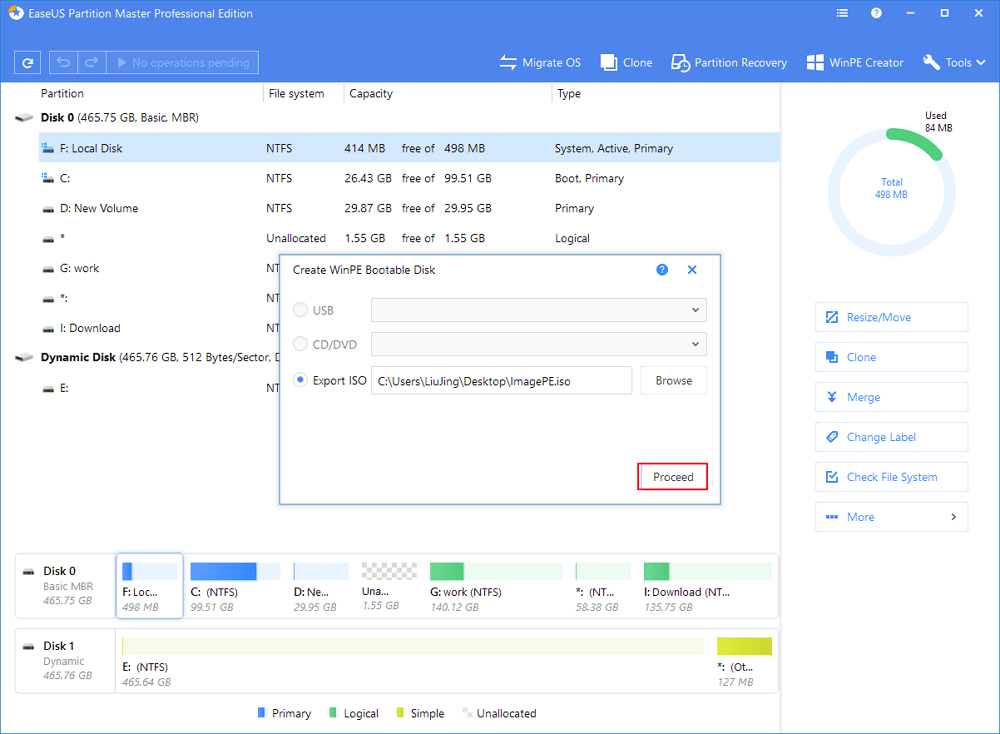
Well, EaseUS Partition Master has an interesting feature known as ‘Rebuild MBR.’ The feature basically rewrites the Master Boot Record (MBR) of the selected disk without interfering with the disk partitions. Here’s how you can use EaseUS Partition Master to rebuild MBR. Step 1. First of all, download and install EaseUS Partition Master on your Windows computer from this link. Step 2. Once installed, launch the tool and click on the ‘WinPE creator’ from the toolbar. Now select to create a bootable disk or a USB drive. Next, click on ‘Proceed.’
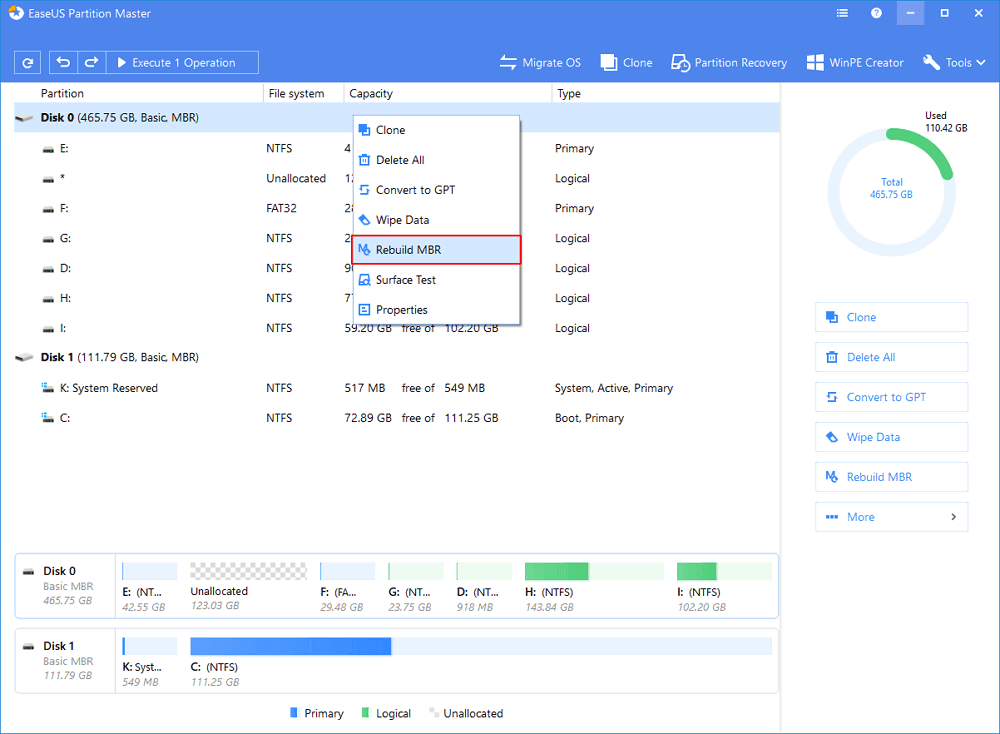
Step 3. Now connect the bootable USB to your PC and then press ‘Del’ during the restart. Simply boot your computer with a USB drive or CD/DVD Drive. EaseUS Partition Master will run automatically. Step 4. Now, you will see all the available disks. Simply right-click on the disk whose MBR you want to fix and then click on ‘Rebuild MBR.’
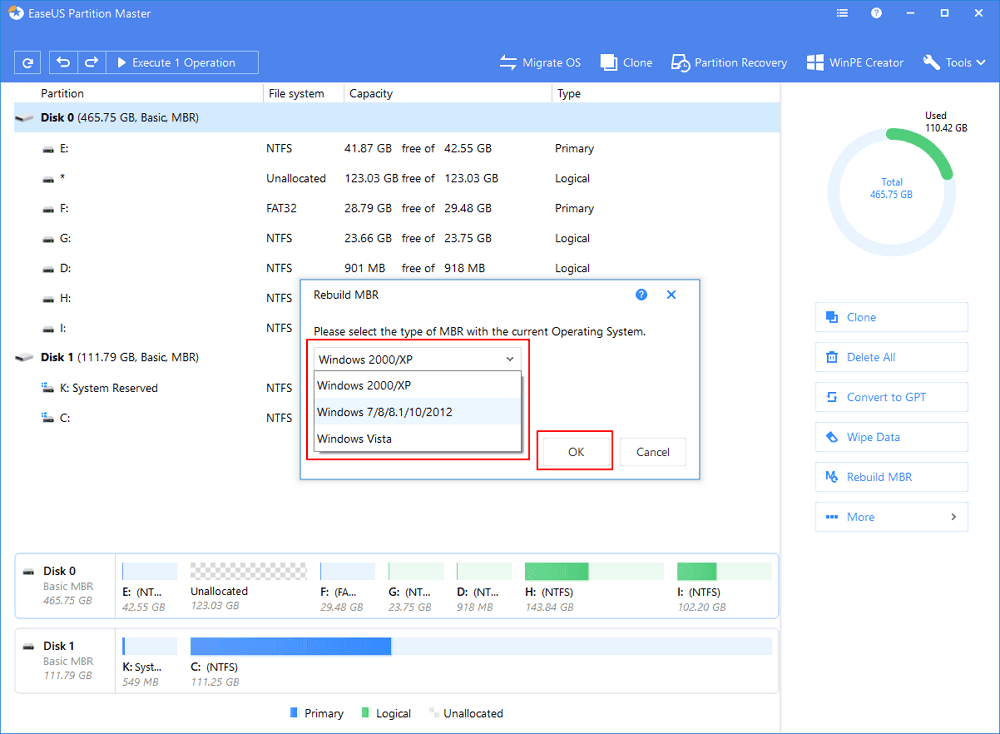
Step 5. In the next step, you will be asked to select MBR type. Select the current operating system and click on ‘Ok.’
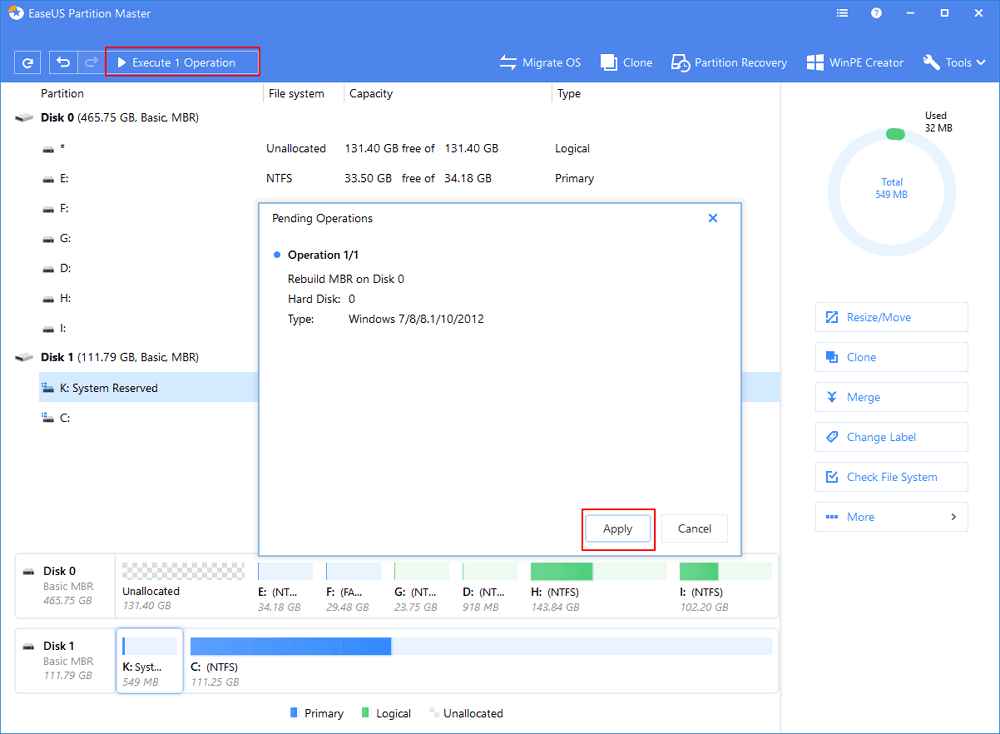
Step 6. Finally, click on ‘Execute 1 Operation’ from the top bar and click on ‘Apply.’
That’s it; you are done! This is how you can use EaseUS Partition Master to fix the MBR.
Using AOMEI Partition Assistant
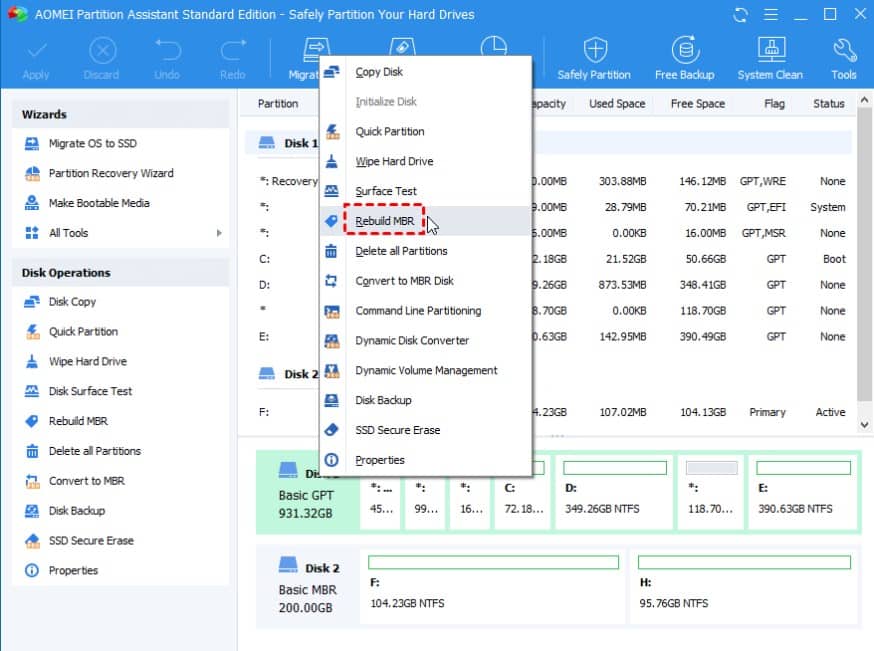
Just like Easeus Partition Master, AOMEI Partition Assistant is another best Windows software that you can use to fix MBR (Master Boot Record). AOMEI Partition Assistant is basically meant to manage Windows partition, but it can do lots of other things. So, here’s how you can use AOMEI Partition Assistant to fix Master Boot Record. Step 1. First of all, download the AOMEI Partition Assistant on your Windows 10 computer and use it to create a bootable media USB. Step 2. Now, insert the Bootable device into the computer, and it will automatically get into the AOMEI Partition Assistant. Step 3. Once done, right-click on the disk with the corrupted MBR and then select ‘Rebuild MBR.’
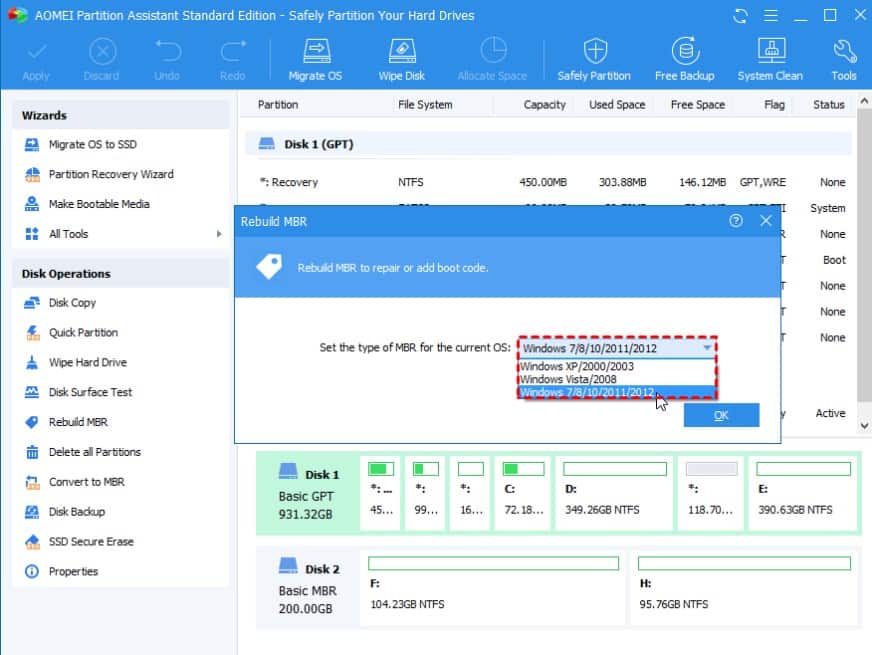
Step 4. In the next step, select the type of MBR for the current OS. Make sure to choose the proper MBR type and then click on ‘Ok.’
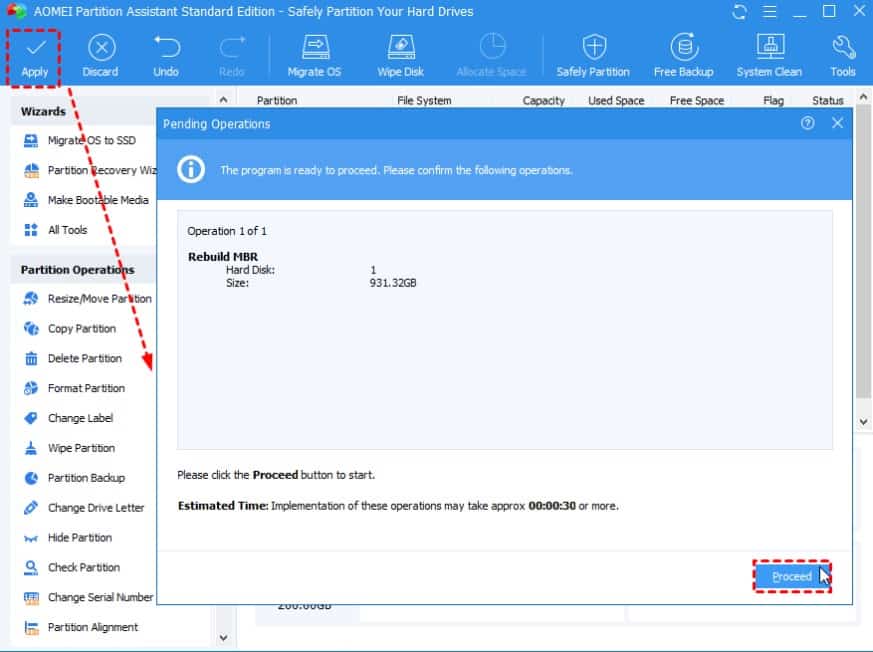
Step 5. Once done, click on ‘Apply.’
That’s it; you are done! Now restart your computer, and the Master Boot Record will be fixed. So the above guide was all about Fix the MBR (Master Boot Record) in Windows 10; read the guide carefully and implement this, and with the MBR will get recovered, and the boot issue will get fixed as this gonna recover that system file that was interrupting OS booting. I hope you like the guide, do share it with others too. Leave a comment below if you have any related queries with this, as the techviral team will always be there to assist you with your issues.
Δ
