You need to clean the Recycle bin to permanently delete the files stored on the recycle bin. Recycle bin is a handy option as it allows you to recover files you didn’t mean to delete. However, over time, Recycle Bin can take up lots of storage space. Although Windows allows users to limit the amount of disk space used by the Recycle bin, many users don’t set the limit. However, on Windows 11, you can set up storage sense to delete the recycle bin automatically. Storage Sense is a storage management feature seen on both Windows 10 and Windows 11. Also read: How to Run Android Apps on Windows 11
Steps to Automatically Empty the Recycle Bin On Windows 11
Since we have already discussed how to use Storage sense on Windows 10, in this article, we will discuss how to empty recycle bin on Windows 11 automatically. To delete recycle bin files automatically, you need to configure the storage sense. Here are the steps to follow.
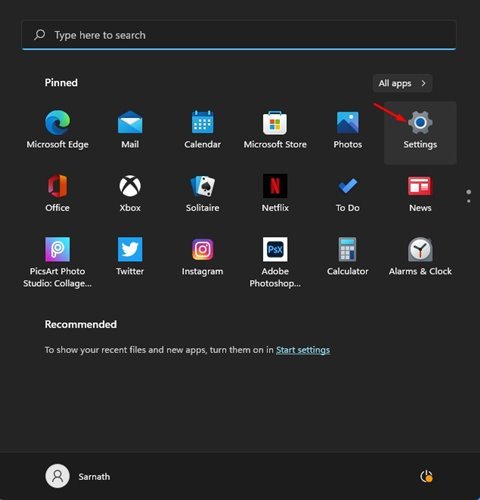
First of all, click on the Windows 11 start button and select Settings.
On the Settings page, click on the System option.
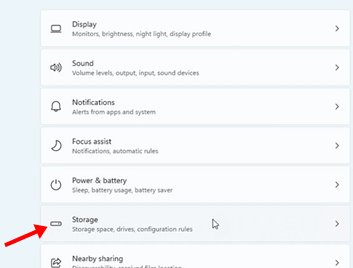
On the right pane, click on the Storage option.
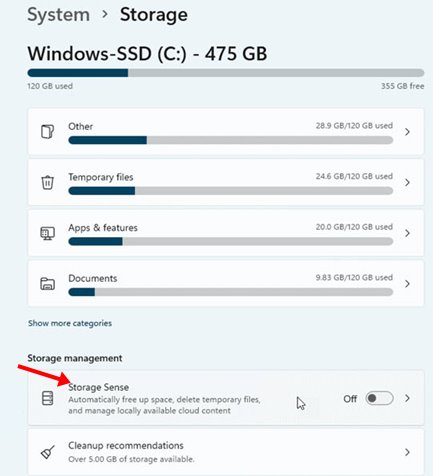
Now, under Storage Management, click on the Storage Sense option.
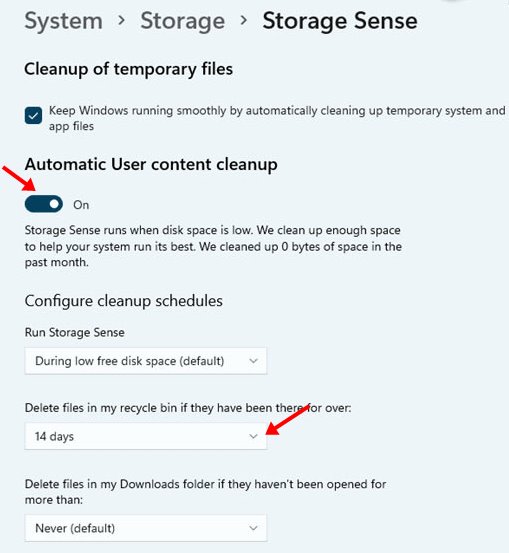
On the next screen, enable the Automatic User Content Cleanup.
Next, under the Delete files in my recycle bin if they have been there for over, select the number of days (1, 14, 20, or 60) from the drop-down list.
That’s it! You are done. Depending on the days you have set, Storage Sense will run and empty the recycle bin. So, this guide is all about how to empty the Recycle bin on Windows 11 automatically. I hope this article helped you! Please share it with your friends also. If you have any doubts related to this, let us know in the comment box below.
Δ


