If you are using Windows 11 and using the wrong version of DirectX, you may experience certain issues while running games or playing videos. The programs that rely on your GPU unit to run won’t work properly. If your PC has a high-end graphics card such as GeForce RTX 3090, 3080 (Ti), 3070 (Ti), TITAN RTX, 2080 (Ti), 2080 Super, 2070 (Ti), 2070 Super, 2060, 2060 Super, it can run DirectX 12 Ultimate.
What is DirectX 12 Ultimate?
Many users confuse DirectX 12 and DirectX 12 Ultimate; both of the DirectX versions are different. DirectX 12 Ultimate is the newest API version and a new gold standard for the next generation of games. If your PC has a compatible graphics card, DirectX 12 Ultimate can take games to a new level of realism with support for ray tracing, mesh shaders, variable rate shading, and sampler feedback. The DirectX 12 Ultimate is fully compatible with Windows 10 version 2004 and Windows 11 as standard. DirectX 12 Ultimate is one of the most important upgrades to utilize your GPU unit’s resources.
Download DirectX 12 Ultimate for Windows 11
Now that you know what exactly is DirectX 12 Ultimate, you may want to download and use it on your Windows 11 computer. The DirectX 12 Ultimate upgrade will accompany the Windows Update if you have a compatible graphics card. You can get the DirectX Ultimate right from the Windows 11 update. Here’s how to use Windows Update to install DirectX 12 Ultimate on Windows 11.
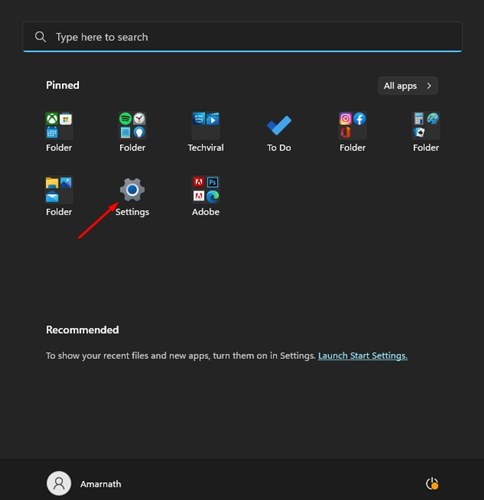
First, click on the Windows 11 Start button and select Settings.
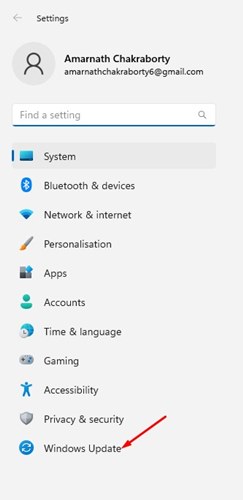
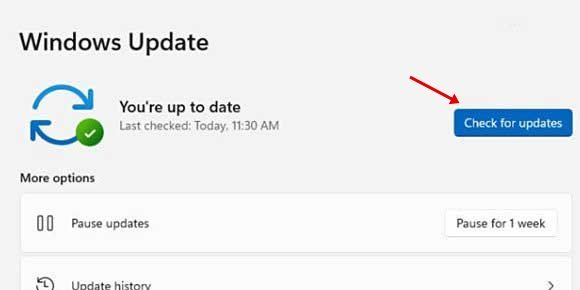
On Settings, switch to the Windows Update tab on the left side.
On the right side, click the Check for update button. If you have a compatible PC, the Windows update will install the DirectX 12 ultimate automatically.
If your PC has a compatible graphics card, DirectX 12 ultimate is still unavailable; you need to download the DirectX 12 standalone installer. You need to download the DirectX 12 installer we have shared below and then run the Windows update again. The installer will automatically check and install the most suitable version of DirectX on your system. Download DirectX 12 for Windows 11
How to Install DirectX 12 Ultimate
After downloading the DirectX 12 installer, you must run it on your device and follow the on-screen instructions. When the installation completes, restart your Windows 11. To confirm the DirectX 12 Ultimate installation, follow the steps shared below.
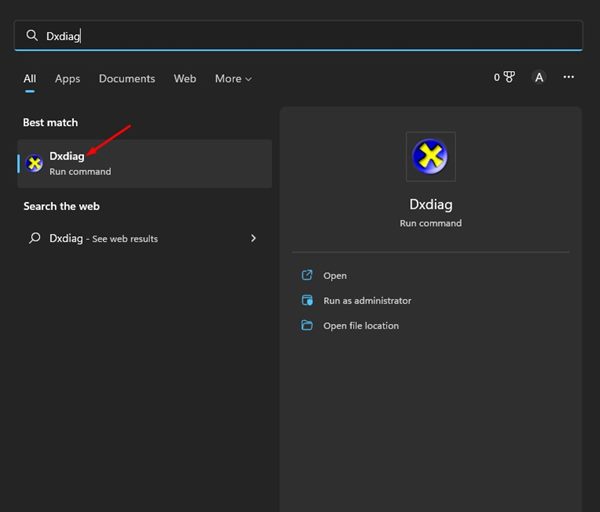
First, click on the Windows 11 search and type dxdiag. Next, open the dxdiag app from the list.
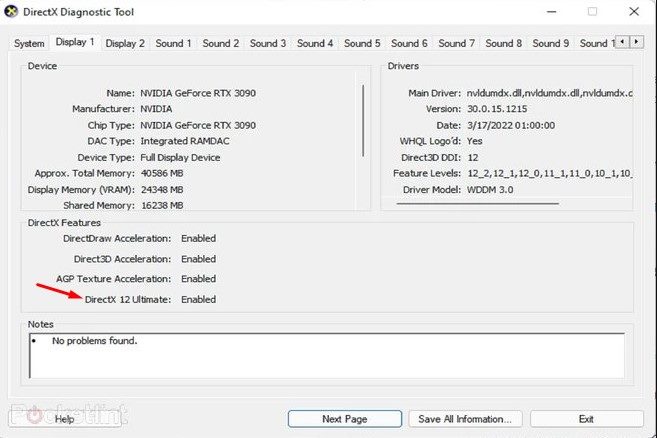
On the DirectX Diagnostic tool, switch to the Display tab. On the Display tab, check the DirectX 12 Ultimate status.
That’s it! This is how you can download & install DirectX 12 on Windows 11. Also read: Windows 11 ISO Free Download Full Version So, this guide is about downloading DirectX 12 for Windows 11 computers. If you need more help installing DirectX 12, let us know in the comments below.
Δ
